How to Update Galaxy S3 I9300 with Android 4 1 2 XXEMG4 Jelly Bean Official Firmware

Samsung has released a new software update for the international version of Galaxy S3 (GT-I9300). The new software update is still based on Android 4.1.2 Jelly Bean and now available in most European countries.

Firmware details
PDA: I9300XXEMG4
CSC: I9300OXXEMG3
MODEM: I9300XXEMG4
Version: Android 4.1.2
Built date: Jul 16, 2013
Regions: United Kingdom, Switzerland, Hungary, Germany, Poland, Spain, South East Europe, Italy, Portugal, Finland, Luxemburg, Bulgaria, Baltic, France, Czech Republic, Greece, Serbia, Bosnia and Herzegovina, Croatia.

Samsung Galaxy S3 I9300 users who missed the Over-The-Air (OTA) update notification or unable to access the update over Samsung KIES, may follow our step-by-step guide to install the update manually.

Pre-requisites
1. Install USB Drivers for Samsung Galaxy S3 on the computer.
2. Enable USB Debugging Mode on the phone by navigating to Settings >> Developer Options.
3. Make a backup of all your important data before following the guide.
4. The Galaxy S3 should be factory unlocked and not locked to any particular carrier.
5. Ensure the battery of the phone is charged more than 80 percent.
6. The Android 4.1.2 XXEMG4 Jelly Bean firmware is compatible only with Samsung Galaxy S3 I9300. Applying this to any incorrect variant might brick the device. Verify the model number of the Galaxy S3 by navigating to Settings >> About Phone.

Files Required
1. Android 4.1.2 XXEMG4 Jelly Bean Firmware (Mirror Link 1, Link 2) for Samsung Galaxy S3 I9300
2. Odin 3.07 (Mirror Link)

Steps to Update Galaxy S3 I9300 with Android 4.1.2 XXEMG4 Jelly Bean Firmware
Step 1: Extract Firmware zip file using WinRAR/7-Zip/WinZip or any other extracting tool, you will get a .tar.md5 file and some other files (optional).
Step 2: Extract Odin zip file and you will get Odin3 v3.07.exe along with few other files.
Step 3: Switch off the phone.
Step 4: Boot the device into Download Mode by pressing and holding Volume Down, Home and Power buttons together until a construction Android robot icon with a warning triangle appears on screen. Now press the Volume Up button to enter Download Mode.
Step 5: Run Odin on the computer as an Administrator.
Step 6: Connect the Galaxy S3 to the computer using USB cable while it is in the Download Mode. Wait until Odin detects the device. When the device is connected successfully, the ID: COM box will turn blue with the COM port number. Additionally, the successful connected will be indicated by a message saying Added.

Note: If the Added message does not appear, then try re-install USB drivers or changing the port on the computer.

Step 7: Choose the following files in Odin from extracted I9300XXEMG4 firmware folder by using respective checkboxes:
  • Select the PDA checkbox, and choose the file named .tar or .md5.
  • Click the Phone checkbox, and choose the file with modem in its name (ignore if there is no such file)
  • Click the CSC checkbox, and select the file with csc in its name (ignore if such file is missing)
  • Choose the PIT checkbox, and choose the .pit file. Use only the file obtained during extracting in step 1 above, otherwise ignore it.
Step 8: In Odin, enable Auto Reboot and F. Reset Time checkboxes. Also, ensure the Re-Partition checkbox is chosen only if a .pit file was chosen in the previous step.
Step 9: Verify everything suggested in Step 7 and Step 8 is done correctly. Then hit the Start button to begin the installation process.
Step 10: Once the installation process is completed, your phone will restart and soon you will see a PASS message with green background in the left-most box at the very top of the Odin. You can now unplug the USB cable to disconnect your device from computer.

Samsung Galaxy S3 I9300 should be now updated with official Android 4.1.2 XXEMG4 Jelly Bean. Head over to Settings >> About Phone to verify the software version running on the device.

Note: If Galaxy S3 I9300 stuck at booting animation after Step 10 then go to recovery mode (press and hold the Volume Up, Home and Power buttons together) and perform Wipe data/Factory Reset and Wipe Cache Partition task before selecting reboot system now function. In recovery mode use Volume keys to navigate between options and Power key to select the option. Please note, performing wiping task will erase your device internal memory data and not external SD card data.
Read More..

How to Update Galaxy Star Pro S7262 with Android 4 1 2 XXUAML1 Jelly Bean Official Firmware

Samsung Galaxy Star Pro with model number GT-S7262 has received another Android 4.1.2 Jelly Bean update with firmware build number S7262XXUAML1. The new official firmware is now available as an Over-The-Air (OTA) update as well as through Samsung KIES.

Firmware details
PDA: S7262XXUAML1
CSC: S7262ODDAMK2
MODEM: S7262XXUAMK2
Version: Android 4.1.2
Build date: Dec 02, 2013
Regions: India, Nepal, Sri Lanka, Bangladesh

Samsung Galaxy Star Pro S7262 users who missed the OTA update notification or unable to access the update over Samsung KIES, can now download and install the same manually using our step-by-step guide.

Pre-requisites
1. Install USB Drivers for Samsung Galaxy Star Pro on the computer.
2. Enable USB Debugging Mode on the phone by navigating to Settings >> Developer Options.
3. Make a backup of all your important data before following the guide.
4. The Galaxy Star Pro should be factory unlocked and not locked to any particular carrier.
5. Ensure the battery of the phone is charged more than 80 percent.
6. The Android 4.1.2 XXUAML1 Jelly Bean firmware is compatible only with the Samsung Galaxy Star Pro (GT-S7262). Applying this to any incorrect variant might brick the device. Verify the model number of the Galaxy Star Pro by navigating to Settings >> About Phone.

Files Required
1. Android 4.1.2 XXUAML1 Jelly Bean Firmware (Mirror Link) for Galaxy Star Pro S7262
2. Odin 3.07 (Mirror Link)

Steps to Update Galaxy Star Pro S7262 with Android Android 4.1.2 XXUAML1 Jelly Bean Firmware
Step 1: Extract Firmware zip file using WinRAR/7-Zip/WinZip or any other extracting tool, you will get a .tar.md5 file and some other files (optional).
Step 2: Extract Odin zip file and you will get Odin3 v3.07.exe along with few other files.
Step 3: Switch off the Galaxy Star Pro.
Step 4: Boot the device into Download Mode by pressing and holding Volume Down, Home and Power buttons together until a construction Android robot icon with a warning triangle appears on screen. Now press the Volume Up button to enter Download Mode.
Step 5: Run Odin on the computer as an Administrator.
Step 6: Connect the Galaxy Star Pro to the computer using USB cable while it is in the Download Mode. Wait until Odin detects the device. When the device is connected successfully, the ID: COM box will turn to light blue with the COM port number. Additionally, the successful connected will be indicated by a message saying Added.

Note: If the Added message does not appear, then try re-install USB drivers or changing the port on the computer.

Step 7: Select the following files in Odin from extracted S7262XXUAML1 firmware folder:
  • Click the PDA button and select the .tar.md5 file.
  • Click the Phone button and select file with MODEM in its name. Ignore if there is no such file.
  • Click the CSC button and select file with CSC in its name. Ignore if there is no such file.
  • Click the PIT button and select the .pit file. Ignore if there is no such file.
Step 8: In Odin, enable Auto Reboot and F. Reset Time checkboxes. Also, ensure the Re-Partition checkbox is chosen only if a .pit file was chosen in the previous step.
Step 9: Verify everything suggested in Step 7 and Step 8 is done correctly. Then hit the Start button to begin the installation process.
Step 10: Once the installation process is completed, your phone will restart and soon you will see a PASS message with green background in the left-most box at the very top of the Odin. You can now unplug the USB cable to disconnect your device from the computer.

Samsung Galaxy Star Pro S7262 should be now updated with official Android 4.1.2 XXUAML1 Jelly Bean. Head over to Settings >> About Phone to verify the software version running on the device.

Note: If Galaxy Star Pro S7262 stuck at booting animation after Step 10 then go to recovery mode (press and hold the Volume Up, Home and Power buttons together) and perform Wipe data/Factory Reset and Wipe Cache Partition task before selecting reboot system now function. In recovery mode use Volume keys to navigate between options and Power key to select the option. Please note, performing wiping task will erase your device internal memory data and not external SD card data.
Read More..

How to Root Galaxy Ace 2 I8160 on Android 4 1 2 XXMF2 Jelly Bean Firmware

Samsung recently released official Android 4.1.2 Jelly Bean update with firmware build number I8160XXMF2 for the international version of Galaxy Ace 2 (GT-I8160). The new official firmware is currently available for the Galaxy Ace 2 users in most Southeast Asian countries.

Samsung Galaxy Ace 2 I8160 users who have already updated their devices with Android 4.1.2 XXMF2 Jelly Bean, may root their devices using the tutorial below.

Disclaimer: Rooting voids the warranty of your device. We and the developer of this rooting procedures shall not be held responsible if any undesirable outcomes may happen to your device. use of this root guide is solely at your own risk!

Pre-requisites
1. Install USB Driver for Samsung Galaxy Ace 2 on the computer.
2. Enable USB Debugging Mode on the phone by navigating to Settings >> Developer Options.
3. Make a backup of all your important data before following the guide.
4. The Galaxy Ace 2 should be factory unlocked and not locked to any particular carrier.
5. Ensure the battery of the phone is charged more than 80 per cent.
6. The Root Package file works only on Samsung Galaxy Ace 2 I8160. Applying this to any incorrect variant might brick the device. Verify the model number of the Galaxy Ace 2 by navigating to Settings >> About Phone.

File Required
1. Root Package for Galaxy Ace 2 I8160 (root.zip)

Steps to Root Galaxy Ace 2 I8160 Running on Android 4.1.2 XXMF2 Jelly Bean Firmware
Step 1: Connect the Galaxy Ace 2 to the computer using USB cable.
Step 2: Copy the root.zip file to the external SD card of your phone.
Step 3: Once the file transfer process is completed, switch off the phone and disconnect it from computer.
Step 4: Boot the device into stock recovery mode by pressing and holding Volume Up, Home, and Power buttons together. In recovery mode, use the Volume keys to toggle between options and Home/Power button to select the desired option.
Step 5: Select apply update from external storage then navigate to the root.zip file which was earlier copied to the SD card.
Step 6: Select the root.zip file and confirm installation.
Step 7: Once installation process is completed, return to main recovery menu and select Reboot System Now.

Samsung Galaxy Ace 2 I8160 running on Android 4.1.2 XXMF2 Jelly Bean firmware is now rooted successfully. You can now install any app that requires root permission. Verify the root status of the device by downloading Root Checker app from Google Play Store.

Note: Tested working on Galaxy Ace 2 I8160 with Android 4.1.2 XXMF2 Jelly Bean firmware, should work with other Jelly Bean firmware. Try it and let us know.

Thanks to all fellas at XDA who first tried out this rooting technique. This root method was originally posted via XDA-Developers original thread.
Read More..

How to Update Galaxy S4 I9500 with Android 4 3 XXUEMK8 Jelly Bean Official Firmware

Samsung Galaxy S4 (GT-I9500) with Exynos 5 octa-core processor has received another Android 4.3 Jelly Bean update with firmware build number I9500XXUEMK8. The new official firmware is now available as an Over-The-Air (OTA) update as well as through Samsung KIES.

Firmware details
PDA: I9500XXUEMK8
CSC: I9500SEREMK8
MODEM: I9500XXUEMK8
Version: Android 4.3
Build date: Nov 21, 2013
Regions: Russia

Samsung Galaxy S4 I9500 users who missed the OTA update notification or unable to access the update over Samsung KIES, and those who are residing outside Russia can now download and install the same manually, using our step-by-step guide.

Pre-requisites
1. Install USB Drivers for Samsung Galaxy S4 on the computer.
2. Enable USB Debugging Mode on the phone by navigating to Settings >> Developer Options.
3. Make a backup of all your important data before following the guide.
4. The Galaxy S4 should be factory unlocked and not locked to any particular carrier.
5. Ensure the battery of the phone is charged more than 80 percent.
6. The Android 4.3 XXUEMK8 Jelly Bean firmware is compatible only with Samsung Galaxy S4 with model number GT-I9500. Applying this to any incorrect variant might brick the device. Verify the model number of the Galaxy S4 by navigating to Settings >> About Phone.

Files Required
1. Android 4.3 XXUEMK8 Jelly Bean Firmware (Alternative Link 1, Link 2) for Galaxy S4 I9500
2. Odin 3.07 (Mirror Link)

Steps to Update Galaxy S4 I9500 with Android 4.3 XXUEMK8 Jelly Bean Firmware
Step 1: Extract Firmware zip file using WinRAR/7-Zip/WinZip or any other extracting tool, you will get a .tar.md5 file and some other files (optional).
Step 2: Extract Odin zip file and you will get Odin3 v3.07.exe along with few other files.
Step 3: Switch off the Galaxy S4.
Step 4: Boot the device into Download Mode by pressing and holding Volume Down, Home and Power buttons together until a construction Android robot icon with a warning triangle appears on screen. Now press the Volume Up button to enter Download Mode.
Step 5: Run Odin on the computer as an Administrator.
Step 6: Connect the Galaxy S4 to the computer using USB cable while it is in the Download Mode. Wait until Odin detects the device. When the device is connected successfully, the ID: COM box will turn to light blue with the COM port number. Additionally, the successful connected will be indicated by a message saying Added.

Note: If the Added message does not appear, then try re-install USB drivers or changing the port on the computer.

Step 7: Select the following files in Odin from extracted I9500XXUEMK8 firmware folder:
  • Click the PDA button and select the .tar.md5 file.
  • Click the Phone button and select file with MODEM in its name. Ignore if there is no such file.
  • Click the CSC button and select file with CSC in its name. Ignore if there is no such file.
  • Click the PIT button and select the .pit file. Ignore if there is no such file.
Step 8: In Odin, enable Auto Reboot and F. Reset Time checkboxes. Also, ensure the Re-Partition checkbox is chosen only if a .pit file was chosen in the previous step.
Step 9: Verify everything suggested in Step 7 and Step 8 is done correctly. Then hit the Start button to begin the installation process.
Step 10: Once the installation process is completed, your phone will restart and soon you will see a PASS message with green background in the left-most box at the very top of the Odin. You can now unplug the USB cable to disconnect it from the computer.

Samsung Galaxy S4 I9500 should be now updated with official Android 4.3 XXUEMK8 Jelly Bean. Head over to Settings >> About Phone to verify the software version running on the device.

Note: If Galaxy S4 I9500 stuck at booting animation after Step 10 then go to recovery mode (press and hold the Volume Up, Home and Power buttons together) and perform Wipe data/Factory Reset and Wipe Cache Partition task before selecting reboot system now function. In recovery mode use Volume keys to navigate between options and Power key to select the option. Please note, performing wiping task will erase your device internal memory data and not external SD card data.
Read More..

Cara Efektif Rooting GT S5830 Galaxy Ace


Cara Efektif Rooting Samsung GT-S5830 [Galaxy Ace] dengan V-ROOT 1.74

Aplikasi Rooting V-ROOT buatan forum china ini memang benar-benar fektif. Smartphone Samsung GT-S5830 [Galaxy Ace] pun bisa di root tanpa kendala. Jika anda tidak mempunyai Komputer atau laptop, anda bisa mencoba aplikasi rooting via hape sperti Framaroot 1.8.1 (Terbaru) untuk melakukan rooting GT-S5830 [Galaxy Ace] tetapi mendapatkan jika gagal anda bisa menggunakan VROOT, pasti jebol nih Samsul Es. :D

Dan jangan terlalu perduli dengan tulisan di blog atau tutorial manapun yang berkata bahwa proses rooting ini sangat berbahaya (termasuk di blog ini) :p. Anda mungkin sering membaca peringatan semacam ini, ini hanyalah langkah antisipasi kalau-kalau anda melakukan sesuatu tidak sesuai prosedur rooting yang dijelaskan dan Samsung GT-S5830 [Galaxy Ace] anda rusak akibat kesalahan anda sendiri.

Jika anda bertanya apakah melakukan rooting ini mempunyai efek samping? jelas! Efek sampingnya ya seperti biasa: Garansi Gugur dan mungkin jika anda tidak berhati-hati, android anda bisa kena malware (lebih banyak yang adware sebenarnya). keuntungannya? anda bisa membuang aplikasi-aplikasi sistem bawaan pabrik yang mengganggu dan mengganggu kinerja smartphone).

Untuk melakukan rooting Android Samsung GT-S5830 [Galaxy Ace] secara efektif, ikuti saja langkah-langkah simpel berikut:
  1. Baterai Samsung GT-S5830 [Galaxy Ace] setidaknya masih 50% (untuk jaga-jaga saja).
  2. Backup kontak, pesan, aplikasi dan segala sesuatu yang Anda ingin simpan.
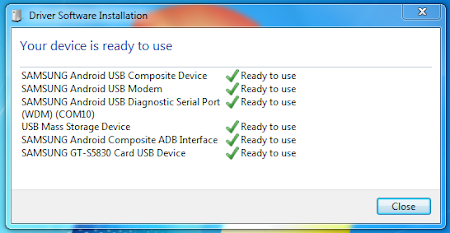
  3. Download Kies untuk meng-install driver Samsung GT-S5830 [Galaxy Ace] dan install di Komputer/Laptop.
  4. Download Tool Rooting VROOT, ada dibawah postingan pilih salah satu (recomended yang versi 1.7.4) dan install juga.
  5. Hubungkan Samsung GT-S5830 [Galaxy Ace] dengan komputer/laptop dengan mode USB Debugging di centang.
  6. Buka Aplikasi Kies, secara otomatis akan mendeteksi driver yang diperlukan.
  7. Akan muncul notifikasi windows, iyakan saja dan tunggu hingga USB Driver terinstall.
  8. Tunggu hingga terlihat USB Connected di aplikasi Kies, untuk memastikan driver terinstall dengan baik.
  9. Matikan lagi Aplikasi Kies dan proses background-nya setelah driver terisnstall.
  10. Jalankan Aplikasi V-ROOT. Bahasanya memang memakai bahasa china, tapi tak perlu bingung.
  11. Lihat di layar aplikasi V-ROOT, jika USB driver sudah terinstall dengan benar, Gambar Icon Smartphone dengan tanda centang akan muncul dan disampingnya ada text ?? .
  12. Lanjutkan dengan menekan tombol Hijau di pojok kanan bawah dengan tulisan China dan ROOT.
  13. Tunggu hingga proses selesai dan muncul text ?? S5830 ROOT [dan tulisan china, saya tidak tahu artinya apa]. Klik lagi tombol hijau.
Smartphone GT-S5830 anda akan reboot secara otomatis sekali. Jika Samsung GT-S5830 [Galaxy Ace] anda sudah menyala, coba cek dulu di drawer aplikasi, cek aplikasi SuperUser dengan logo perisai biru sudah terinstall atau belum.

Jika belum ulangi sekali lagi.

Seperti pengalaman dalam tutorial rooting menggunakan V-ROOT sebelumnya, ada yang Superusernya berbahasa china.

Jika Aplikasi Superuser masih berbahasa china anda bisa mengganti aplikasi super user yang support Bahasa Indonesia.
Download ToolRooting Android China
V-Root Versi 1.7.0 | di sini
Update 15 November 2013 - V-Root Versi 1.7.3 | Download
Update 30 Desember 2013 - V-Root Versi 1.7.4 | Download
Read More..

Cara Memasang CWM untuk Galaxy Mini 2

Cara Install CWM Pada Samsung Galaxy Mini 2, Seiring dengan berjalannya waktu dan bertambahnya sebuah pengalaman seseorang akan semakin banyak pula kawan yang ingin meminta bantuan yang berhubungan dengan pengalaman tersebut, salah satunya adalah seorang kawan yang berasal dari kota Sidoarjo Jawa Timur yang meminta tolong untuk menginstall CWM pada Gadget kesayangannya yaitu "Samsung Galaxy Mini 2".
Samsung Galaxy Mini 2 GT-S6500D termasuk generasi dari "Samsung Galaxy Mini" yang sudah mengalami peningkatan pada firmwarenya sehingga untuk melakukan instalasi CWM caranyapun juga berbeda, untuk itu kita harus sedikit teliti dalam melakukan setiap ubahan jangan sampai keliru dengan pendahulunya.

Langkah dan Cara Install CWM (ClockworkMod) Pada Samsung Galaxy Mini 2 adalah sebagai berikut
Alat serta bahan yang diperlukan silahkan download pada link url dibawah ini:
1. Odin3 v1.85 http://adf.ly/XYGJT
2. Samsung Usb Driver http://adf.ly/BhDY7
3. Clockworkmod-jena.5.2.0.8 http://adf.ly/XYGbC

Langkah dalam install CWM:
1. Download Odin3 v1.85 (Extract)
2. Download dan Install Samsung USB Driver pada PC
3. Download Clockworkmod-jena.5.2.0.8
4. Matikan HH dan hidupkan kembali HH dengan menekan Tombol Home + Volume Down + Power secara bersamaan
5. Setelah HH menyala buka Odin3 v1.85 yang telah Anda download tadi dan klik 2X Odin3 v1.85.exe untuk menjalankan Odin
6. Sambungkan HH dengan PC menggunakan Kabel Usb sampai pada Odin mendeteksi HH yang ditandai dengan warna kuning seperti terlihat pada gambar dibawah ini


Odin3 v1.85

7. Jika sudahsesuai dengan gambar diatas selanjutnya klik pada tombol bertuliskan PDA dan cari file Clockworkmod-jena.5.2.0.8.tar, lihat gambar

Odin3 v1.85

8. Selanjutnya pastikan pada Radio Button bertuliskan Re-Partition tidak dicentang lihat gambar diatas dan jika semua settingan sudah benar langsung klik tombol Start dan tunggu beberapa saat sampai proses selesai dan muncul tulisan PASS dengan latar hijau lalu tunggu sampai HH Reboot dan lepas kabel usb

Sampai disini proses instalasi CWM (ClockworkMod) sudah selesai dilakukan.
Cara Ini juga berfungsi Untuk
Tutorial Cara Root Galaxy Mini 2 Series Works 100%


NB: Resiko Tanggung Sendiri

Selamat mencoba.
 

Read More..

How to Update Galaxy Tab 2 10 1 P5100 with Android 4 1 2 XXDMD1 Jelly Bean Official Firmware

Samsung has started rolling out the Android 4.1.2 Jelly Bean update for the Galaxy Tab 2 10.1 with model number GT-P5100. This update is currently available for the Galaxy Tab 2 10.1 users from Southeast Asia countries - Indonesia, Malaysia, Philippines, Singapore, Vietnam, and Thailand.

This update Brings the 4.1.2 Jelly Bean stuff such as Google Now, new Notification panel, re-bumped widget and for system’s better enhancements and improvements that fixes lags and re-draws issues.

Firmware details
PDA: P5100XXDMD1
CSC: P5100OLBDMD1
Version: Android 4.1.2
Built date: April, 2013
Regions: Indonesia, Malaysia, Philippines, Singapore, Vietnam, Thailand

The Galaxy Tab 2 10.1 users who fail to upgrade their devices with Android 4.1.2 Jelly Bean using official method, may follow our step-by-step guide to update manually.

Pre-requisites
1. Install USB Driver for Samsung Galaxy Tab 2 10.1 on the computer.
2. Enable USB Debugging Mode.
3. Make a backup of all your important data before following the guide.
4. The Galaxy Tab 2 10.1 should be factory unlocked and not locked to any particular carrier.
5. Ensure the battery of the tablet is charged more than 80 per cent.
6. The Android 4.1.2 XXDMD1 Jelly Bean firmware is compatible only with Samsung Galaxy Tab 2 10.1 P5100. Installing this on any incorrect variant will brick the device.

File Required
1. Android 4.1.2 XXDMD1 Jelly Bean Firmware for Galaxy Tab 2 10.1 P5100
2. Odin 3.07

Steps to Update Galaxy Tab 2 10.1 P5100 with Android 4.1.2 XXDMD1 Jelly Bean Firmware
Step 1: Extract Firmware zip file that you downloaded already from above link, you will get a .tar.md5 file and some other files.
Step 2: Extract Odin zip file and you will get Odin3 v3.07.exe along with few other files.
Step 3: Power off your tablet. Wait 5-6 seconds for vibration to confirm complete switch off.
Step 4: Boot the device into Download Mode by pressing and holding Volume Down and Power buttons together until a warning screen appears. Then press the Volume Down button to enter into Download Mode.
Step 5: Run Odin on the computer as an Administrator.
Step 6: Connect the Galaxy Tab 2 10.1 to the computer using USB cable while it is in the Download Mode. Wait until Odin detects the device. When the device is connected successfully, the ID: COM box will turn yellow with the COM port number. Additionally, the successful connected will be indicated by a message saying Added. If Odin fails to detect the device then re-install USB driver.
Step 7: Choose the following files in Odin from extracted P5100XXDMD1 firmware folder by using respective checkboxes:
  • Select the PDA checkbox, and choose the file named .tar or .md5.
  • Click the Phone checkbox, and choose the file with modem in its name (ignore if there is no such file)
  • Click the CSC checkbox, and select the file with csc in its name (ignore if such file is missing)
  • Choose the PIT checkbox, and choose the .pit file. Use only the file obtained during extracting in step 1 above, otherwise ignore it.
Step 8: In Odin, enable Auto Reboot and F. Reset Time checkboxes. Also, ensure the Re-Partition checkbox is chosen only if a .pit file was chosen in the previous step.
Step 9: Verify everything suggested in Step 7 and Step 8 is done correctly. Then hit the START button to begin the flashing process.
Step 10: Once flashing completed, your tablet will restart and soon you will see a PASS message with green background in the left-most box at the very top of the Odin. You can now unplug the USB cable to disconnect your device from computer.

Samsung Galaxy Tab 2 10.1 P5100 should be now updated with official Android 4.1.2 XXDMD1 Jelly Bean. Head over to Settings>> About Phone to verify the software version running on the device.

Note: If Galaxy Tab 2 10.1 P5100 stuck at booting animation after Step 10 then go to recovery mode (press and hold the Volume Up and Power buttons together) and perform Wipe data/Factory Reset and Wipe Cache Partition task before selecting reboot system now function. In recovery mode use Volume keys to navigate between options and Power key to select the option. Please note, performing wiping task will erase your device internal memory data and not external SD card data.
Read More..

Blog Archive

Powered by Blogger.